Showing posts with label paint. Show all posts

Friday, March 22, 2013

the backyard: shed update

When I look at our backyard, I see ... potential. When other people look at it, they probably see an eyesore.

The backyard has always been ugly. Part of the patio is brick -- but the bricks were installed right on top of the dirt, and it's sunken and broken in places. The other part of the patio is concrete that is cracked and missing some pieces. There was an ill-placed garden bed with overgrown plants.

Plus, this is the shed that came with the house (in a photo from last fall):


Finally, Tony and I are starting to tackle the backyard. I've come up with a plan to fix things up, and we're going to make progress in pieces as our schedules and patience permit.

First up: the metal shed.


The color is awful. And it just looks ... old. And it's all rusty.


So I went to Home Depot and started pricing new sheds. I really liked those fancy big cedar ones. But they're surprisingly expensive, and it was hard to justify spending so much money, especially because we need a fairly large shed to accommodate all of our garden stuff.

So that brought me to the paint aisle. And in the end, Tony and I decided to try to salvage the shed with some Rust-Oleum paint.

We started by using a wire brush to remove as much of the rust as we could. We gave the whole shed a coat of primer, making sure the rusty spots were covered especially well.

As for colors, I decided to paint the shed white with a big pop of color for the door. Voila!


I had considered a lot of other colors ... black, brown, gray ... but I decided against dark colors that would absorb heat since summers here tend to be, you know, hellish.

And check out that roof: no rust! Tony and I actually did the painting last fall, and we let it sit in the elements all winter before declaring the project a success.


And this project gives me a good framework as I plan the rest of the patio project. I'm now thinking about how to incorporate bright white and candy-apple red into the rest of the backyard decor to tie it all together.


The next backyard project is going to be putting in a raised garden bed. I'll post an update soon!

Thursday, March 14, 2013

decor: flower pot rehab

My father-in-law goes to a lot of auctions, so last year I asked him to keep an eye out for large terra cotta pots that I could use in my garden. Sure enough, he bought me a huge box of pots that I used for tomatoes, peppers and other veggies. And the box included a couple of extra ceramic pots that I stored the shed and forgot about until recently.

I bought some new houseplants at Lowe's, and Tony and I went out to the shed to find some pots for them. I already had a can of white paint out for another project, so when I came across this weirdly spotted pot in the shed, I got thinkin.


You probably already guessed what I did, didn't you? I painted it white.


Even I was surprised at how good it turned out. I kept the inside black and the bottom black, and the contrast is beautiful.


For the saucer, I took an extra terra cotta saucer and painted it black. Easy as pie.


I took something that didn't go with my house at all and turned it into a nice decor element with just a few strokes of paint.

Thursday, January 10, 2013

home improvement: electrical box disguise

I blogged earlier this week about adding a kitchen cabinet door, and this is a blog post about an electrical box door. This is the week of doors! Tony and I have a long, long queue of home improvement projects in our house. And the projects we move up in the queue are the things that are annoying me at the time, haha. Once we fix one thing, something else always pops up as a glaring annoyance. And what had been annoying me lately was the industrial gray electrical box in our living room.


I needed to soften the color, so it wasn't such an eyesore. I decided to paint the electrical box glossy white to match the trim, outlets and vents.

I unscrewed the door from the wall. I roughed it up with steel wool, and then I wiped it clean. I propped the door open with a spare can of spray paint and used two pieces of scrap paper to protect the labels on the inside. And then I taped off the handle and the hinges.

The thing got about 15 light coats of spray paint with several minutes of drying time between coats. Tony and I were doing some work in our backyard that day, so every 5 minutes or so, I'd walk over to the door and give it another light coat.


And the electrical door is no longer a glaring annoyance. Mission accomplished. And if you have a gray utility box in your house, know it's an easy project to tone down the color. It's the little things that are making me love this house even more.

Wednesday, November 28, 2012

decor: pirate trunk makeover

About a year ago, Tony and I stopped at a moving sale in our neighborhood and scored big time. I got a midcentury orange chair to match my living room decor for $5, some necklaces (including the one I wore to this wedding) for $1 each, flower pots for 10 cents apiece and a pirate trunk for $10. The stuff was priced to sell.

I've blogged before about the trunks in my house. (Exhibit A. Exhibit B.) I have five trunks and actually have been keeping my eyes peeled for a sixth. They're all different and interesting to look at, not to mention functional.

The pirate trunk, for example, is just the right size to fit (most of) our CD collection. I know this is an MP3 world, but I don't think we're going to be getting rid of the CDs any time soon because we're fuddy duddy like that. Actually, Tony keeps adding to the collection. When I'm scoping out pirate trunks and purty necklaces at garage sales, he gravitates toward the inevitable pile of CDs that the seller's trying to unload. He'll get them for a song (or free) and bring them home and upload them to iTunes.

Anyway, so we have this pirate trunk that holds CDs. The problem is ... it was hideous.


The trim on the left side was a broken disaster. And are those handles on the front?

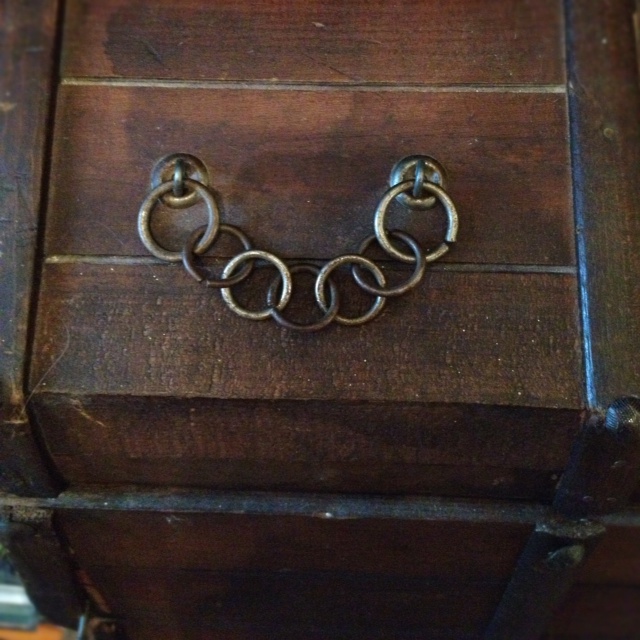
And what's up with the chains?


A little wood glue and a nail fixed the trim problem, and spackle filled the holes. 

Tony is officially in charge of all demo projects in the house, so I enlisted him to remove the chains and diamond-shaped wood handles, which were also on the side of the trunk.

And then I took a paintbrush to that bad boy last weekend and gave him a new life as a white pirate trunk.


I (usually) love the way natural wood looks, so I cringe when I see people paint natural wood furniture. But not in this case, for two reasons. 

First of all, the trunk style is dated, and white paint made the piece more modern and look like it belongs in the house of young adults.

Second, the trunk was constructed with butt joints. Since my dad got into woodworking, I've gained an appreciation for the craftsmanship of joints. Dovetail joints, for example, take time to put together and will produce a sturdy piece of furniture. I just went around my house looking for dovetail joints, and the ones in my kitchen drawers are easy to see because they're two-toned:


Butt joints are an easy way out. Put two boards together, hammer a nail and call it a day. Bottom line, butt joints = non-heirloom-quality furniture = paint may be permissible, in my book.

I kept the original latch and just spray painted it when I painted the front door hardware.

White pirate trunk, where have you been all my life?