Tuesday, December 11, 2012

home improvement: door won't shut

You guys are lucky ducks -- you get two read about two home improvement projects in two days. (Yesterday I blogged about replacing tiles in our bathroom.)

Tony and I have been in home improvement mode lately. Last week, I made a to-do list, room by room, of all the things we need to accomplish in the house while we live there. Ohmygosh is that list intimidating. There's so much we have to do. I figure we should get cracking on these projects soon, so we can enjoy them over the next few years.

The to-do list for our bedroom included this gem: Make Tony's closet door shut. Yeah, the door wouldn't latch, so for the past year and a half, Tony's closet door has been an inch or two ajar.

Here is the after photo, and, as you can see, that door is firmly shut. Success!


The strike plate is in the wrong position, so I had to move it slightly to the right, so the latch can catch it.

Before:


After:


It's a subtle difference.

Now, there was one obstacle in this project. Moving the plate required drilling new holes for the screws, and since I didn't have to move the strike plate that far, the new holes would overlap with the existing holes. And if you were to drill one hole overlapping with another hole, you'd just end up with one big hole, and the screw will slide around.

So this is a tip I picked up from my dad, who picked it up from my grandpa, who was a carpenter. Cut off small pieces of toothpicks, cover them in wood glue, and pack them into the existing holes. Let the glue dry, and you can drill your new holes.


File this under: Projects That Shouldn't Have Taken 19 Months To Do.

<3

From the archives:


Monday, December 10, 2012

home improvement: attaining intermediate

Good news, guys. Tony and I have officially attained "intermediate" status as far as home improvement projects go.

Here's why attaining the intermediate level is important: Earlier this week, I'd been doing some research about the possibility of Tony and me tearing out our ugly back patio and replacing it ourselves. I got a boost of confidence when I saw that the Lowe's DIY page listed this project as intermediate. It says building a patio is the same skill level as installing a ceiling fan or build a birdhouse.

We were able to reach intermediate level in a completely unrelated project Saturday afternoon. Tony and I set out to replace two mismatched tiles in our bathtub, but we ran into a bit of a hiccup. I frantically called my dad on Skype to show him the problem, and he said that if we could pull this fix off, we'd officially be intermediates. And if there were anyone able to bestow beginner, intermediate and expert levels for home improvement projects ... it would be my dad.

(I'll fast-forward about six hours ... we fixed that baby! Intermediates, heck yeah.)

If you want a tutorial on replacing bathroom tile, touching up grout, and caulking a bathtub, you should probably consult Bob Vila or an "expert." This is just the story of two intermediates claiming victory over home improvement.

OK, here is the before photo.


Someone, at some point in time, clearly needed to access behind the tub, so they removed two of the tiles. I'm guessing they couldn't be bothered to go to Home Depot and spend 10 cents on the correct tiles to match, so they just put in two white tiles they had lying around. Also, it's hard to tell from the photo, but the white tiles are a little bit sunken, not flush with the rest of the brown speckled tiles.

I used a hammer and chisel to remove the grout around the two bad tiles.


Which turned out to be super EASY because the tiles were more or less just sitting in this hole with grout around them. No backerboard. No mortar. And there's a 4-inch hole between where the backerboard should be and what appears to be a cement wall.


This is the point where the Skype call was made. 


My dad was really great, and he helped us come up with a plan. First, we used construction adhesive to attach two short 2-by-4s to the concrete wall.


Once that set, we used the construction adhesive again to attach a piece of plywood to the other side of the 2-by-4s.


The plywood is acting like our backerboard here, which gave us something to spread the thin-set mortar on. We used a whole bunch of the thin-set to get the new tiles flush with the old tiles.


The replacement tiles are from Community Forklift. A while ago, I spotted some that match our bathroom, so we grabbed a few because we knew this would be a project we'd have to tackle eventually.


Next we grouted around the new tiles, and we touched up the grout in the rest of the tub, which had been chipping off over time.

And finally: caulk! I scraped out all of the layers of old caulking around the tub and replaced it with caulk that is mold and mildew resistant, which is important for bathrooms.


Which brings us to the after photos.

Drum roll please...


Lookin good, am I right? The tile selection wouldn't be my first choice if I were to pick the tile for our bathroom, but re-tiling our entire tub is not on our to-do list. And at least they all match now!


I'm really proud of ourselves. Looks like intermediates did this project, doesn't it?


And the other great thing about this project is that it gave us the confidence boost we'll need to work with mortar, tile and grout to re-tile the floor in our half bath ... eventually ...

Thursday, December 6, 2012

dining out: busboys and poets

Tony and I had a super festive Saturday evening. We started out in Old Town at the holiday boat parade, and we ended up at Avery's Christmas party in Shirlington. And in between all that Northern Virginianess, we stopped for dinner at the Busboys and Poets in Shirlington.

I'm a big Busboys and Poets fan. I love the food, and I appreciate how many vegetarian dishes are on the menu. Before last weekend, I'd only ever been to the U Street restaurant, which is great, but there always seems to be a wait. In Shirlington ... no wait! Same good food, same cool vibe, no wait. You just have to go to the burbs.

I ordered the tempeh sandwich, which I very highly recommend if you're into that kind of thing. It's my favorite thing on the BBP menu.


(It also made me think that I should make more tempeh at home. Note to self.)

Tony ordered an appetizer for his dinner -- vegan nachos. He's not vegan (not even vegetarian), but I always give him credit for being an open-minded eater.


<3

The boat parade, by the way, was a nice wholesome holiday event. Tony, Valerie and I parked ourselves at the end of a dock behind the Torpedo Factory and watched the decorated boats drive down the Potomac. My favorite boat was dressed up like Rudolph, haha:


These sailboats were fun, too. The boat on the left was pulling a dinghy with a snowman in it, and I thought that was funny. And the green one that's lit up like a tree was purty.


Also, how quaint and festive is Old Town:


Holiday boat parade -- a good holiday outing. It's something to keep in mind for next year at this time. 

Wednesday, December 5, 2012

recipe: pesto-spinach-feta pizza

All this fall, Tony and I have been spending our Monday nights at Valerie and Andrew's apartment, eating dinner, hanging out and watching The Walking Dead. (Except we haven't seen the mid-season finale yet - no spoilers!) Valerie and Andrew both are great cooks, and a few weeks ago Andrew made us a pesto-spinach-feta pizza that I have not been able to get out of my head.

So when Dena came over to our house for dinner Sunday, I wanted to replicate the deliciousness that Andrew created. You will love this pizza.


For the crust, I used my hands-down favorite crust recipe from Cook's Country, which is crispy like Pizza Hut crust.

The recipe that follows will make two 9-inch pizzas. (I made three pizzas Sunday by increasing all of the ingredients by 50 percent.)

Pesto-Spinach-Feta Pizza

For the crust
  • 1/2 cup olive oil, divided
  • 3/4 cup plus 2 tablespoons milk
  • 2 teaspoons sugar
  • 2 1/3 cups flour
  • 1 tablespoon (1 packet) yeast
  • 1/2 teaspoon salt

For the pesto
  • 1/2 cup nuts (pine nuts, walnuts or almonds -- I used walnuts)
  • 2 cups greenery (basil, spinach or arugula -- I used spinach)
  • 1/2 cup cup olive oil
  • 1 garlic clove
  • dash of salt

Toppings
  • 2 handfuls spinach, chopped
  • 2 ounces feta
  • 2 cups shredded mozzarella

As you start on the dough, heat the oven to 200 degrees. When it comes to temperature, turn it off.

In a saucepan, heat milk to almost boiling. Off heat, add sugar and 2 tablespoons olive oil.

In a stand mixer bowl, mix flour, yeast and salt. With the dough hook attached and the mixer on speed 2, slowly add the milk mixture. When dough comes together, continue mixing for 5 minutes.

Shape dough into a ball with your hands and placed into a greased bowl. Cover and set in warm oven for 30 minutes.

Meanwhile, prepare the pesto. In a frying pan, toast the nuts over medium heat. Then add all of the ingredients to a food processor and pulse until pesto comes together.

Prepare two 9-inch round cake pans by placing 3 tablespoons of olive oil in each pan. Note: 8-inch pans also will work.

Once dough has risen, divide in half. Use a rolling pin to roll each half into a 9-inch circle. Place dough into the prepared pans. Cover and let sit for 20 minutes.

After dough has risen, poke each crust with a fork 8 times. Top each pizza with 1/3 cup to 1/2 cup pesto. Add half of the spinach, half of the feta and half of the mozzarella to each pizza.

Bake for 20 minutes at 400 degrees. Remove from oven and let sit for 1 minute. Use a flexible spatula to slide the pizza from the pan and onto a cutting board. Cut each pizza into six pieces.

Tuesday, December 4, 2012

the garden: tomatoes in a bag

It is December, and we are eating tomatoes from my garden.

A couple of weeks ago, when the temperature was supposed to hit freezing overnight, I covered my cool-weather vegetables (lettuce, spinach and celery) with towels, and they all survived just fine and are still going. But I thought a frost would be too much for my tomatoes, so I picked all of the green tomatoes and brought them inside.

To help them ripen, I put them inside a brown paper bag and folded it closed. I keep it in my kitchen, and every couple of days when I open it, there will be a couple more red tomatoes ready to come out. It's like magic.


Behold, my windowsill on Dec. 1:


I love this climate.

Monday, December 3, 2012

recipe: english muffins

Saturday morning, Tony and I had brunch at our house with Ben and Mandy. Tony suggested we have breakfast sandwiches, which I thought was a great idea. I wanted to make the sandwiches on some sort of homemade bread, and after a little Googling, I learned that homemade English muffins are pretty easy to make.


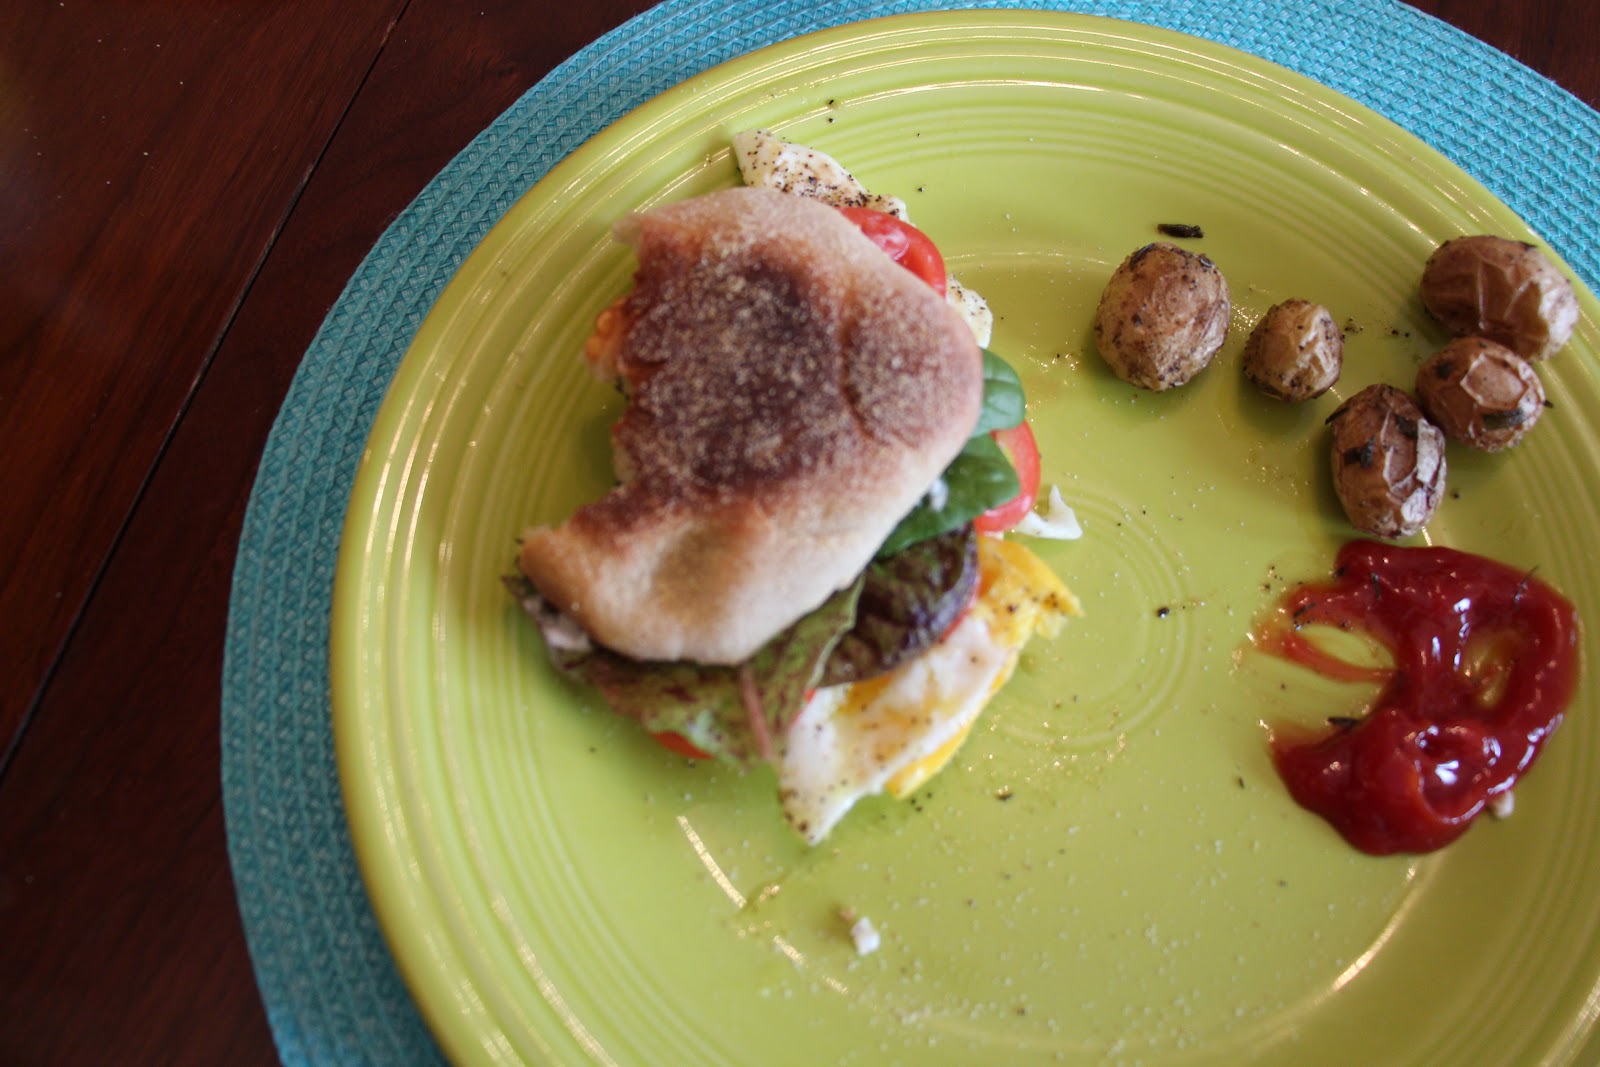
(That's a photo of one of the leftover muffins, which Tony ate with butter. During brunch, I got so caught up in trying my sandwich that I forgot to take a photo until it was half gone. Oops. They were delicious.)


I like this recipe, which I adapted from this blog, because you make the dough the night before. Then in the morning, all you have to do is cook the muffins.

English Muffins

  • 1 cup milk
  • 1 tablespoon butter
  • 1 tablespoon sugar
  • 1 tablespoon (1 packet) yeast
  • 2 cups flour
  • 1/2 teaspoon salt
  • cornmeal

Heat the milk to almost boiling. Remove from heat and stir in butter and sugar. Add yeast and let sit 10 minutes.

Meanwhile, mix flour and salt in a large bowl or in the bowl of a stand mixer.

When yeast mixture is bubbly, add to the flour and mix. I used the dough hook on my stand mixer.

Let sit for 15 minutes and then stir in salt.

Transfer dough to a greased bowl and cover with plastic wrap. Let it sit on the counter overnight.

In the morning, use your hands to form six muffin-shaped patties. Drop muffins into a small bowl of cornmeal, then place in an ungreased skillet. I cooked two of the muffins in my small cast iron skillet and the rest in a teflon pan, and they all turned out great.

Cook muffins on the stovetop in the skillet over low heat for 10-20 minutes per side until browned.


Let muffins cool completely on a cooling rack. Split the muffins with a fork, not a knife. Toast before serving.

Makes 6 muffins.


<3

The breakfast sandwiches were very easy to put together in the morning. Each sandwich got two eggs, and on the table I put out white cheddar, lettuce, tomato and mayo. (By the way, this was Dec. 1, and the lettuce and tomato are from my garden ... how awesome is that to be eating garden tomatoes so late in the year?)


Oh, and I also put out French's onions for the sandwiches ... to keep it classy. 


On the side: roasted rosemary mini potatoes. And to drink: Bloody Marys. Yum all around.